Tampilkan postingan dengan label Decorating and more... Tampilkan semua postingan

The Lively-wood Studio

Diposting oleh Miras Jogja on Senin, 19 Maret 2012

It has been a four years since I started Lively-wood. Nurturing and flowing with it made these years go by and I thought it was time to gift this endeavor a little something. It was time to progress a little! So a shabby little workshop turned into the Lively-wood Studio. A place to display my work, colour, ideas and every little thing that helps me create something new!!


To start with the mirrors, I needed a place to display each and every one of them so that I keep the artwork intact and at one glance, my customers or visitors have a chance to see them all. It also meant, having all the floor space for other things.


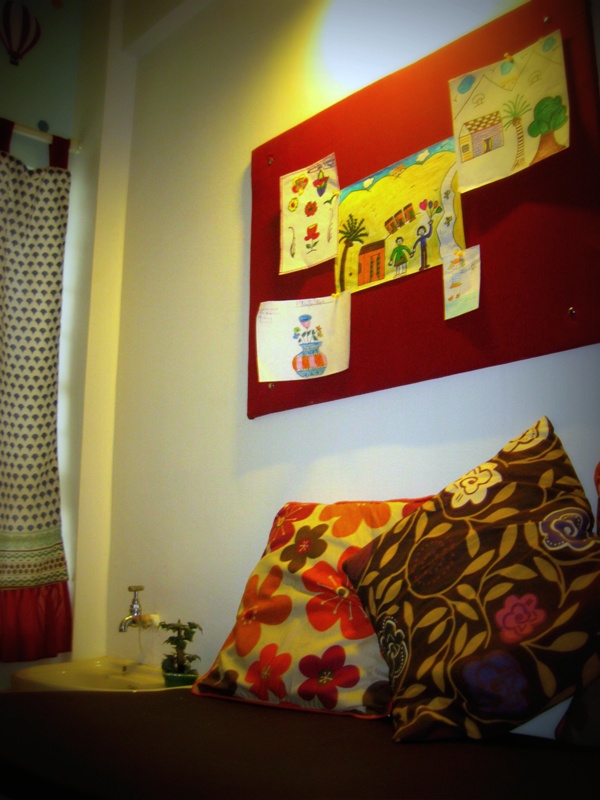
A desk with knick-knacks that motivate me, was an important element. I had preserved these mementos from my college days which had abundant memories yet were packed in boxes. I had to get all of it out along with some recycled clocks and put it up right there. I had a artwork, lying around from a project, that I didn't want to throw and was wondering how best to put it to use. So this leftover work turns into a bright bold red grid with the mementos and all my paper gets a display on the soft board hung over my desk!


Like I mentioned in one of my earlier post, I am going crazy recycling! Yes, I went crazy re-using as much as possible even this time! I started with using two steel cut outs which were lying around from Bipin's Dad's factory in the scrap heap. I coloured them and displayed them at the entrance of my studio. For now, I think they look great there! The next I re-used was a window grid made with very good quality sagwan or teak wood. I decided to paint it deep blue and used it as my little chandelier! The list like that, goes on and on...


Lastly, I wanted to display whatever was left behind. A ceramic bell, paper lights, a bird cage and so many little knick-knacks!


Its so nice when some loved ones visit you. I loved taking them to my studio and also felt good to be appreciated.


Read More

Dealing with Small Spaces? Trunks do it all!!

Diposting oleh Miras Jogja on Jumat, 16 Desember 2011

Sometimes we find some old treasures in our locked garage or may be on a loft above some store rooms...do you remember exploring something like that? And there...boom...we find a mysterious storage trunk!!! Whether you have this fond memory or not… there always has been and always will be a wonderful mystery and comforting feeling surrounding trunks!


A trunk is flexible enough to correspond well with any home décor, whether you prefer antique and classic or contemporary and modern. Obviously, you can use a storage trunk for storage… and there are many things you can do here. But in small homes, apartments, or dorm rooms you can use it as a decorative end table or coffee table.

Trunks in a Living Space


A decorative trunk can be used as a side table to place a lamp, coasters, and a book on beside your favorite chair. You can also store out of season items inside, such as curtains, blankets and sheets, or holiday decorations. When used as a table, a storage trunk gives you a quick and convenient access to storage without sacrificing style.


Or, you can also use a decorative trunk as a coffee table. You can store items that are used while entertaining guest such as board games, table runners, etc. This brings style and offers functionality.

Storage Trunk in the Bedroom


The best way to save space, make it look different and have a good amount of utility, make your trunk a stylish side table. If you drink water at night, be sure to place your glass on a coaster so you don’t cause any damage. Inside, you can store out of season clothing which are sorted out just once in a while.

Trunks for Gazing & Relaxing..


A storage trunk can be used as a rustic style seating bench by a window, perhaps covered with antique dolls and stuffed animals to provide a comforting appeal. It can be placed in your spare room or a study where activities like reading take place.

The Hidden Bar


Get that decorative box on casters and have a mobile bar anywhere in the house! In case you do not like to have your liquor displayed, a wine trunk or a mini bar serves best!


All that mess my child makes!


A pretty little trunk can be made to hide pictures, books, board games, or toys and stuffed animals for the kids. In one of my projects, I made a pretty colourful trunk with locking casters which could not only be used as storage but also served as a bench or a chair. It slid perfectly under the study table, consuming absolutely no floor space.
Read More

Doctors Office gets a Makeover - Ballooooonni Balloon Library & Children's Work Space!

Diposting oleh Miras Jogja on Jumat, 05 Agustus 2011

My doctor client now has a consulting room, a waiting area, a small reception and a pretty little library with loads of goodies and space for toddlers to teenagers. When I met her, she was in great dilemma, she has a lot of books, little therapy sessions for kids and young patients, so how could she accommodate all this in her spare area? The room needed to look cute, bright, cheerful on one hand and on the other, demanded space for her books and work area for children. So here it goes.....


A central view of the room, a wash basin, a nice display of children's work on a push pin board and a study on the side.


I thought of displaying children's inspirational handy-work on the central wall of the room. It made the room very warm and welcoming.


Making the room comfortable to sit and work was also important. In case of sessions, a spare examination bed was essential. Hence we gave it enough storage for books underneath and threw pillows to make it warm and inviting.

So far, the view of the library has been hidden. Ardent readers often have problems, they can't resist buying books and then, there is no place to stack them. Small open & closed shelving was made to display some interesting books and the stack the other reference books below them.


However, a desk, toy trunk and toys were important ingredients of this space. Yet everything needed to be compact and comfortable.


A Ballooooonni Trunk was made with a fluffy foam seating, with ample space which serves well as a bench for the table and fits perfectly under it, saving space and making it compact. A lot of people asked me if the cushion came off the trunk while opening it. The answer to this is no, it is completely removable with a removable cover as well and yet attached well to the trunk top.


The biggest highlight of the room were the Balloooonnni balloons on the wall. The light blue wall with a variety of air balloons painted on it made the room look colourful and alluring for not only kids but even adults.

I even thought of making a frilly light curtain to cover a small window. It did wonders to the wall and to the face of the entire room.


Read More

The White Loop Quarters

Diposting oleh Miras Jogja on Rabu, 11 Mei 2011

Sometimes you have 4 walls, a pale ceiling, some windows and an opening to a terrace and a bright flooring, you love it and yet you hate! You want a change, you want to liven it up again, re-do it without breaking a bank or endure a complete re-model. The answer is-you guessed it-in the details.

The changes I'm suggesting fall into four main categories:
Walls
Lighting
Furniture
Accessories

You'll be surprised at how much you can do with a paintbrush and acceptance of the fact that less really is more -

Walls


A major change that will occur in your house is after you paint. Start by the basic, how do you want your room to look? Bright, Colourful, Pale, Pastel? What colour will match the shade of your floor and furniture? Test some colors in different lights. Experiment.Do not be scared to try something new. The White Loop Quarters project I worked with, needed light, lots of it. It has a low ceiling and maroon flooring which made it look smaller despite a good room size.

Lighting


Just like you wear a beautiful necklace to accentuate your dress, lighting makes whatever else you have on look even better. It transforms the place and brings in warmth. Dim spots in the room can be highlighted with standing lamps. In this room I wanted to make it look cozy yet bright hence standing white lamp against the yellow walls gave a gentle glow to the room.

Furniture


One of the important elements of re-doing space is furniture. The living room had too many subtle tones of yellow, brown and white. I needed to perk it up yet, not pick anything too bold which would make the room look smaller. Hence the sofas were designed and made with teak wood and turquoise polka dots upholstery. We threw pink cushions on it to give a slight splash of colour.


A slender 'L' shaped coffee table was made which essentially consumed less space and a taller side table was fixed in the corner to add interest and scale. The room felt clean and roomy. Such an obscure piece of furniture, sometimes, does the deal!


A tall pane-like entertainment centre was placed diagonally with the wall. It served a purpose of a divider between the living and dinning area and it concealed the clutter. No place in the middle of the room could be allocated to accommodate the TV and its accessories since it could kill the perception of space. Hence an odd wall was picked to showcase the same.

Accessories


Pillows, pots, lamps.....flowers, etc add visual interest and substance. Accessories are both a blessing and a curse. This living room benefits from the bold pink pillows on the turquoise blue sofas.


Another accessory is the mantle or shelf fixed on the wall. Framed by red vases, and stripped of clutter, the mantle looks clean and dramatic.


One of the real focal points for the room is the White Loop divider! The huge room had to be segregated into two - living and the dinning. White, cascading loops being the pattern, stole the show! It gave a punch to the room and yet did its job of partial separation!


What you are is what your home is....isn't it? Hence, with the 4 fundamentals of Wall, Light, Furniture & Accessories, this space was converted into a serene, cozy, warm and a welcoming quarter.
Read More

Organizing Art on Wall....Not A Big Deal!!

Diposting oleh Miras Jogja on Kamis, 24 Maret 2011

A lot of us pick up art and wall accessories from various places we travel or as and when we see something interesting. Once its home, it is either lying around somewhere or we get all stressed about getting it up on the wall! How do I drill holes in the wall? How high should it be mounted? How can it be arranged with other pieces to create an inspired statement? Lets talk about getting this job done with less stress and yet be safe, secure and beautiful!

Basics & Style


Step I: When you’re ready to hang the art, the next step is choosing where each piece should reside. If you decide to put more than 2 pieces of art together, make sure how they look good. If the wall is narrow and verticle, perhaps putting them one below the other may bring out its beauty. Or if the wall is wide, placing pictures horizontally might be more appealing.


Step II: When hanging a pair of works, one above the other, treat them as one large picture. It doesn't matter if they are the same or different sizes.


Step III: There is no right or wrong way to do it. Always start from the middle, pick a focal picture or art and work your way out. Work your proportions keeping the central artwork. It isn't even sometimes necessary to have a sequence or logic.

Step IV: Always ask someone to help you to hold these pictures against the wall for you. Then you can take a step back to see what the space is going to look like, understand the proportions and colors, best suited to the wall or the room.

Proportions & Spacing


Step V: Usually, while hanging art, the center of the picture should be about 60-65 inches off the ground, which places it at eye level.


Step VI: For spacing between art on the same wall, 2-3 inches are used for medium or large size pictures or 1.5 inches for smaller frames. Now, note that the same spacing is important above, below, and on either side of each frame.


Step VII: Lastly, do not be stressed about hanging pictures on the wall. It needn't be perfect or logical. As long as you have worked on your basic proportions, things can't go very wrong. Infact changing displays of art every once in a while freshens things up and lets you display your new work or collection!
Read More

Leisure Lounge @ Home!!

Diposting oleh Miras Jogja on Senin, 21 Februari 2011

Most of us have little getaways from our mundane lives; and certainly, we need to have at least some of them near us! Well that’s how the idea of the Leisure Lounge came up!

A room not bigger than 200 sq ft needed to be converted in to a lounge area which would accommodate several things and yet make it look like a lounge. The area needed to fit in a book case, study, storage, loft, a bar, a cabinet to showcase a shot glass collection and a stage to accommodate a drum set and other smaller drums from West Africa and Middle East. Now the challenge was to be able to fit so many things in 200 sq ft without cluttering the space and still making it look classy, roomy and artistic!


Very few people have an inclination of collecting something special that will remind them of a place, person or an incident. Here, the challenge was to be able to accommodate over 120 shot glasses collected from travels all over the world. A cabinet had to be made to display, preserve and present the collection.


Next came in another very interesting feature yet a little discreet and innovative. A bar had to be made in a way that an outsider would not know, yet when opened, gave you a surprise! A chic painting with miniature bottles studded on the door of the bar makes it unique and funky! Along with a regular bar, a mobile wine cellar with bottle holders and a tray was also made to be able to push it around to other rooms.


Since this room is a mixture of some fun and work, a study and book case had to be accommodated. More than 200 books needed to be placed and protected from the ever increasing dust. Despite the space constraint in the bookshelf, a small feature had to be added to break the tedium of the quadrangle. An illuminated square was fixed off centre in the bookcase with zigzag shelves which flaunted odd some objects breaking the monotony of its content.


A long desk was made with two storage cabinets. The one on the left was made permanent while the one on the right is movable in order to fit two people on the same desk if need be.


Lastly, the room couldn’t be complete without a platform to hold a striking collection of drum set. The reason for the elevation of the podium was to reduce noise and vibrations produced while playing. Taking advantage of the height, some storage was also created under the stage. The wall and door that bordered the drums was demolished and a glass was fixed in order to cut the noise that made its way outside.


Read More